Owning a vehicle with elegant features for your kids can be the best bet for their hauling and accommodating some of their stuff. However, sometimes these cars come with aluminum oil pan that can crack. The effing pan is what becomes annoying and believe me; the entire comfort will be ruined.
The existence of road potholes and textures might differ based on the road you are using, meaning that the pan can be affected. That will happen if your car bumper is on the ground, making it break the oil pan when jumping bumps. Well, the issue is fixable and that’s why we are here for you.
Our article contains useful information that we hope will help you fix oil pan leak with JB weld. Despite the JB weld being known for its temporal solution, it can really help you before opting for a long-lasting treatment. Sometimes you can even combine the JB Weld with Silicone for a double approach.
Contents
Ultimate guide on fixing oil pan leak with JB weld

Below is a full guide that should assist you to correct a leaky oil pan with the help of JB Weld. Here we go;
Step 1: Emptying the Pan
Start by draining the oil from the pan, ensuring it doesn’t seep. Just try your level best to drain it.
Step 2: Thorough cleanliness
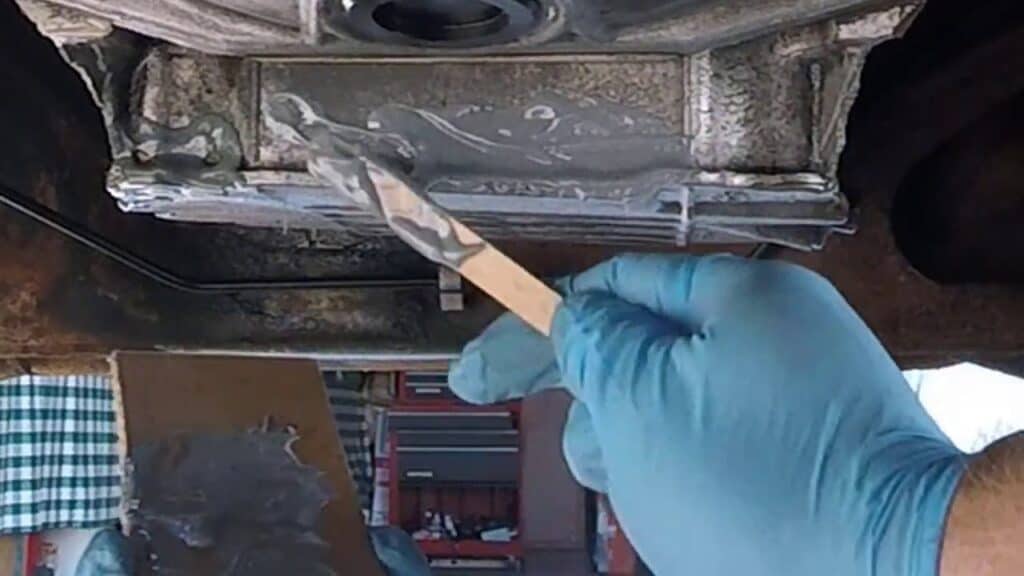
Your safety should come first and therefore putting on gloves can be the best action. You are allowed to use paper towels and brake cleaner plus any available anti-oil cleaning material. What you need to be sure is to leave the oil pan free from any spot.
You should never cease until you spot the crack you plan to work on. Sometimes there might be several cracks, but if it’s your lucky day, you can easily spot tiny c-shaped cracks. Additionally, you should evaluate and determine whether the pan allows patching or not.
In situations where the crack is small, then you can go on and give it a try. You need to understand that even a simple crack has the capability of emptying your crankcase.
Step 3: Sanding
The next step will be to sand the given area until it not only becomes rough and nice. Doing so is necessary to accommodate adhesives. Some experts will refer to this as a microsurface.
Now that the surface is rough and clean, try evaluating the seepage. It doesn’t matter how long you wait, what matters is to see consistent oil seep from that crack.
Sometimes going straight to the silicone won’t help, this means that you should first cover the area with something then followed by the silicone. Patching the crack can leave the substance useless and oil soaked. Therefore, if the seepage is worse, advance to the next step which will force you to change the gloves.
Step 4: Get an oil containment bowl

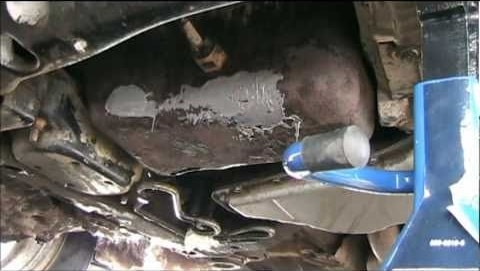
Experts recommend using a small washer from your alternator pulley of the Beetle. The component comes with a small shape with a diameter of 1 inch diameter, containing an open bottom. You should then use the JB weld and penny to seat the bottom. Give it some times to set before testing.
Additionally, you should place the paper shop towels in the cracks to act as an oil-slowing device. The next thing will be to JB weld the whole bowl on the crack.
Remember, anything like a bowl-like washer can work great, as long as it features a bondable rim plus a small dish area. Try to observe whether the oil drips in the bowl to soak the tiny paper towels. The oil should not escape from the bowl bottom.
Step 5: Coating the JB welded cover with grey silicone.
This step involves applying a thin layer of silicone that won’t interfere with the functionality of the bowl. Under the same step, you are required to substitute the gloves because oil contamination can ruin the entire state-of-the-art. More so, you should wait for the silicone to completely cure before doing anything.
Step 6: Applying the second coat
Before applying another coat, you should first check the workability progress. Up to this juncture, there should be not a single drop of oil seepage. Apply the next thin silicone coat and then don’t forget to change the gloves; get the clean ones.
Step 7: Curing
There’s nothing you can do to achieve this step rather than leaving it overnight. In situations where a single night isn’t enough, don’t lose patience. You should only test the artwork when it’s fully cured.
Step 8: Final inspection
Before you start filling up your engine with oil, make sure there’s no kind of oil leakage. In case there’s no oil drops, the process was successful; if not, you are pretty boned.
Arriving at this point requires some attention and keenness. You would rather own an ugly oil pan, but with no drips.
Well, after considering the above step, the best result is what you should expect.
Step 9: Refilling the engine with oil
The last thing you are supposed to do is to fill the engine with oil. Before getting a new oil pan, give a trial to JB weld and you will never regret it. It can be suitable for those fellows operating under financial constraints.
Before arriving at a protective plate idea, consider a temporal solution. However, oil pans are not fun parts, meaning that they can still be fragile.
You might be interested to read also our another comprehensive article of:
Fixing A Cracked Block With JB Weld
FAQs;
- Can I JB weld my oil pan?
Absolutely yes. JB welding your oil pan can offer a temporary solution to your leaky oil pan. However, you can opt for TIG welding and that is optimal. You don’t have to doubt the action because many people have given it a trial and it worked.
- Can I patch a leaky oil pan?
If you are not careful a cracked oil pan can lead to leaks that may end up damaging the engine of your vehicle. Fortunately, this is something that you can handle yourself with the help of a few directives. Based on the size of the crack, our guide above can be the best dose for you.
Remember, the job won’t consume much of your time as it can take up to 24 hours, curing included. You don’t have to just jump on the vehicle before 24 hours is over; your efforts will be in vain.
- Can epoxy really stop oil from leaking?
When your car is aging, it’s likely to develop cracks in its oil pan. This issue is common and that means that you will not be the first person to experience such.
Instead of substituting the cracked pan, it’s possible to use epoxy and seal the leak. With the epoxy, a robust bond will be formed on any material it comes in contact with after mixing.
Final words
From our discussion, you can realize that fixing oil pan leak is possible with the help of the JB weld. You can decide to assign the job to the expert or you do it yourself.
I want to assure you that leaking the oil pan of your car should be a past tense. We have provided you with enough information to seal the leaky oil pan of your car engine. You should therefore carefully go through our report.
